The Fast Color Corrector is the effect of choice within Premiere to quickly remedy footage that has been shot with incorrect white balance settings within the camera. It is very important to adjust white balance in camera according to the lighting conditions during shooting to achieve accurate color rendition of the image. The controls of this effect appear in the Effect Controls Panel as follows:
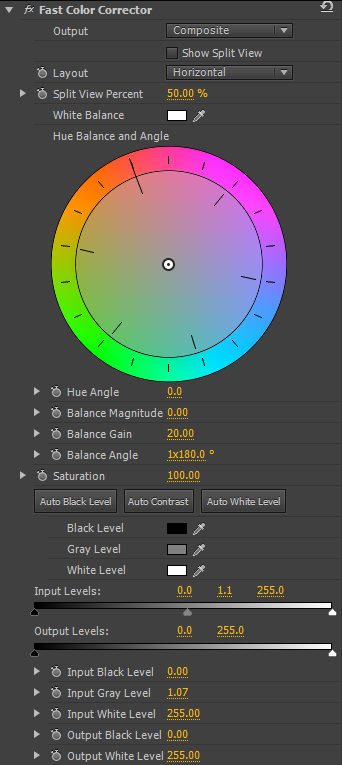
Output
Here we may select to view the overall color adjustment of the image by selecting “Composite” or the tonal range of the image by selecting “Luma”. When selecting “Luma” the color information is removed so that we can more clearly see adjustments in contrast within the image.
Show Split View
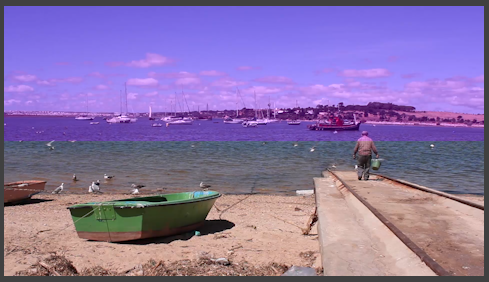
Check this box to divide the screen into “before and after” of the application of the video production effect. This screen split may be Vertical or Horizontal depending upon our selection under “Layout“. Below we can see some color correction applied with the split view checked in horizontal mode. The top half of the image is coloured, the bottom half is the original.
Split View Percent
This adjusts the ratio between the sides of the split view
White Balance
This parameter allows us to quickly automatically adjust the white balance of the image. Simply click the eyedropper icon and then click on a part of the image in the program monitor that is, or should be white. The overall white balance of the image will then be changed. let’s see this in action:
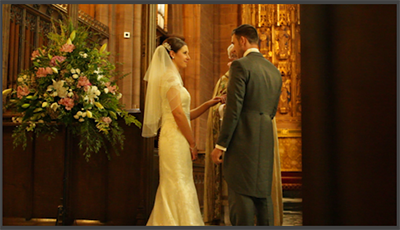
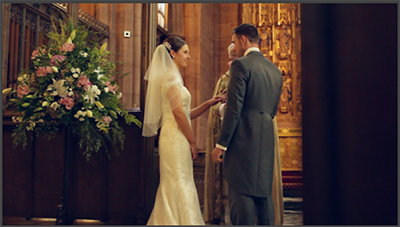
In the image below we have used the white dress of the bride to automatically adjust the white balance.
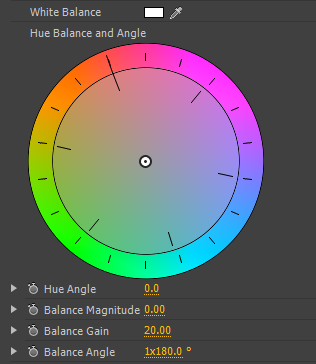
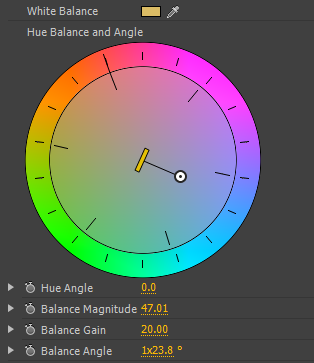
Hue Balance and Angle
These parameters may be adjusted using either the color wheel or the numerical values. In simple terms, drag the small white circle towards any color to increase that particular color content within the image. The further towards the outside of the circle, the greater the effect. If we look at our example, we can see that the image contains a yellowish hue. To compensate for this, we would usually drag the icon in the color wheel in the opposite direction to yellow to achieve a correctly balanced image. Below we can see the parameters in their nominal state on the left, and the results of our automatic white balance correction on the right.
Saturation
Here we may change the overall color saturation within the image. At a value of 100, there is no change, this may be increased to 200 for maximum color saturation or reduced to 0 for complete desaturation of the image.
Auto Black Level
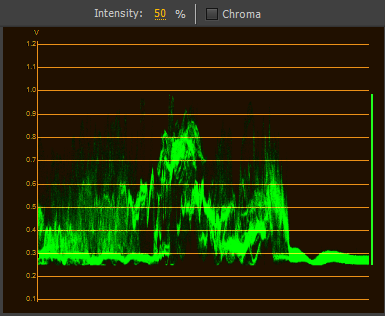
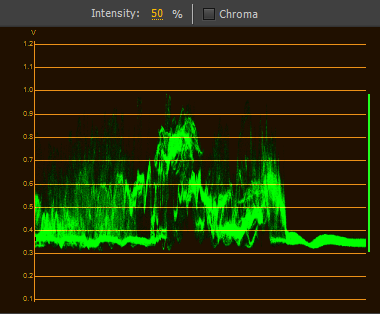
If our image is too dark, click the auto black level to change any black portions of the image to within the acceptable tolerances of the format. For example, when working in PAL format, blacks will be clipped to a minimum of 0.3v as discussed in a previous lesson regarding the Reference Monitor. Below we can see the reference monitor from an image that is too dark. To the right we can see the same image with the Auto Black Level applied.
Auto Contrast
This control adjusts both the auto black level and auto white level at the same time
Auto White Level
If we have blown out highlights within an image, then this control will clip these levels to the appropriate value (1.0v PAL).
Black Level, Grey Level, White Level
Here we may select the reference black, grey and white levels by selecting pixels within the image with the eyedropper tool. We may also click the color icons to open a color selection swatch for each level.
Input Black, Grey and White Level
Adjusts the input levels numerically rather than using the slider. The subject of video input and output levels is fairly complex, so you may just need to know that they alter the values of the shadows, midtones and highlights within the image. Increasing the Input Black Level will darken the shadows, increasing or decreasing the Input Grey Level will lighten or darken the midtones within the image, reducing the Input White Level will increase and blow out the highlights. Always use the Reference monitor to check that the levels are acceptable.
Increasing the Output Black Level will lighten the shadows within the image, decreasing the Output White Level will darken the highlights.
Video levels are measured from 0-255. When moving the input levels we are effectively “remapping” the extreme black and white points within the image.
Effect Usage
The Fast Color Corrector is intended to do exactly that, color correct images quickly. There is a distinction between color correction and color grading which is worth noting. Color correction is the art of correcting issues with color within a certain image or clip. Color grading is the art of giving a production an overall “look” and is usually done once all the basic editing is complete. The fast color corrector can of course be used to create a “look” to your video production and is often used as a grading tool.
If you would like to arrange a video production course for yourself or colleagues in Manchester then please contact us via the details in our web header.