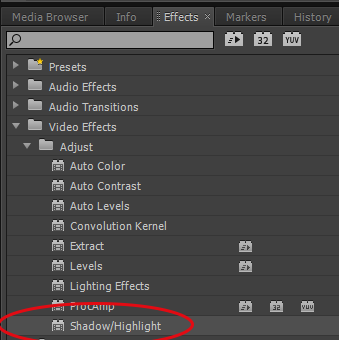
Shadow & Highlight is the final effect available in the Adjust group. It can be useful to correct exposure problems within an image or video clip. For instance, a clip may appear too bright in some areas, yet too dark, with too much contrast in others. Select the effect and apply it to the Fisherman 1 video clip or any other clip that you have on your Timeline.
Effect Properties
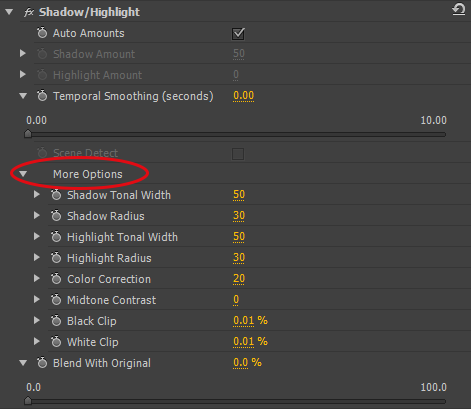
Ensure that the “More Options” triangle has been twirled down to view all of the options available.
Auto Amounts
When the effect is applied, the Auto Amounts option is checked automatically and the Shadow & Highlight manual adjustment controls are greyed out so that they may not be altered. Switch the “Fx” button on and off to observe the effect upon your image. If your video clip has been captured with good lighting and exposure then the auto-corrected difference may be subtle. Let’s look at a before and after on our Fisherman 1 video clip. The image on the left is the original.
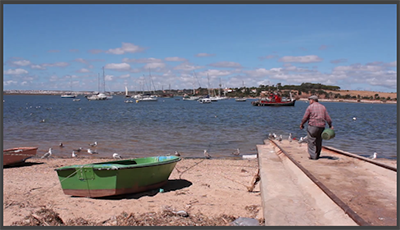

Look at the side of the green boat, the change is the most noticeable there. There is quite a good balance within the original image, so it has not been altered too much.
Temporal Smoothing
With the auto settings checked, Premiere CS6 will analyse the video on a frame by frame basis which will create an unnatural result if the lighting conditions change within the video clip. With Temporal Smoothing increased, Premiere analyses several frames at a time, to employ a more gradual change.
Scene Detect
This works with Temporal Smoothing in that Premiere will detect a change of scene within the clip, and ignore those frames when making smoothing calculations.
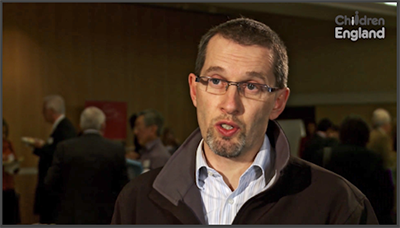
Let’s try a different image, drag an instance of the Interviewee 1 video file to your Timeline. The original image looks like this:

Here is the affected image with the auto setting checked:
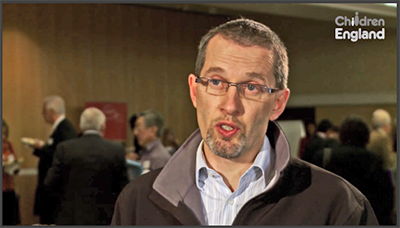
If your image contains quite a lot of shadows, the auto setting will tend to be a little harsh, so it may be better to un check this setting and make some manual adjustments. Uncheck the “Auto Amounts” box and let’s explore the options.
Shadow Amount
This defaults to a setting of 50. At zero our original image remains unaffected, at 50 the shadows are considerably lightened.
Highlight Amount
This setting defaults to zero in manual mode. Increasing this setting will seek out the highlights in the image and darken them.
Shadow Tonal Width
With a low setting, Premiere affects only the very darkest areas of the image. With a higher setting, more shades are affected.
Highlight Tonal Width
With a low setting, only the very brightest elements of the image are affected. With a higher setting, a wider range of the brighter elements of the image are affected.
Shadow Radius
Increasing this setting will enlarge the shadow areas within the image
Highlight Radius
Increasing this setting will enlarge the highlighted areas within the image
Color Correction
This setting will increase the colour saturation of the shadows and highlights effect
Midtone Contrast
This setting will increase the contrast within the midtones of the image
Black Clip
Will adjust what Premiere believes to be black within the image
White Clip
Will adjust what Premiere believes to be white within the image
Blend With Original
If the effect is a bit too severe or unnatural, increase this setting to mix the affected image with the original image
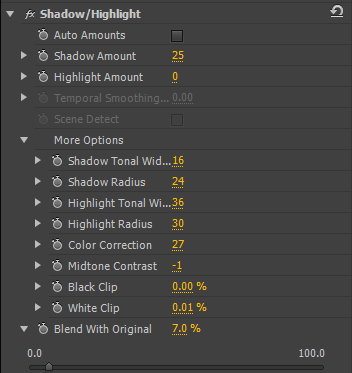
Here we have the final, adjusted image and settings used: