Audio transitions allow us to move smoothly from one audio “state” to another. For example, from silence to the full volume of a particular clip. Adding fades to the start and end of an audio clip (however small) is a professional practice that will avoid any nasty clicks or unwanted noise within your sequence. We may also want to blend two audio clips together over time and audio transitions may be used for this.
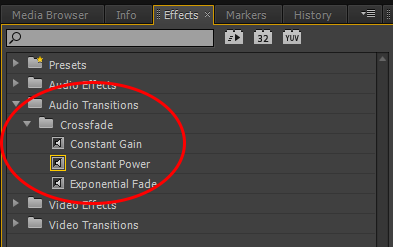
The audio transitions may be found within the Effects Panel, under Audio Transitions/Crossfade
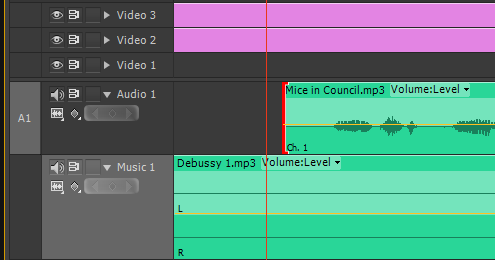
Zoom into the timeline and trim up the start of the “Mice in Council” audio clip so that we are close to the beginning of the audio waveform.
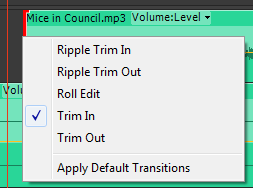
Now let’s add the default audio transition, “Constant Power” (the default transition is denoted by the orange square around it) to the start of the audio clip. Right click on the start of the clip to reveal the pop-out box and select “Apply Default Transition“.
To change the default transition simply right click on a transition in the list and select “Set Selected as Default Transition“

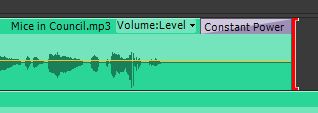
The beginning of the clip should now look like this with the transition denoted by the purple box. You may lengthen or shorten the transition by dragging the box with your mouse. We have now applied a single-sided audio transition which gives a smooth rise in volume from silence across the start of the clip.
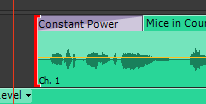
In this instance, we may like to shorten the transition so that any noise inherent in the clip will be gently faded up before the vocal starts. At high volumes this will make a noticeable difference to the quality of our edits as the abrupt noise introduction will become much less apparent and our video production will sound professionally produced.

At the end of the Mice in Council clip, we may add the same transition and the audio will automatically be faded out.
Double Sided Transitions
Up until now, we have only applied single sided audio transitions that allow us to move from silence to full volume, or full volume to silence. Sometimes we need to move smoothly from one piece of audio to another and this is known as a crossfade. The time it takes to move from one audio clip to the other is determined by the length of the transition.
Let’s start our sequence with music, transition to voice-over, and then back to music at the end of our sequence. Pick up the voice over clip and drop it onto the music track. Then delete any transitions that are present between the two clips.
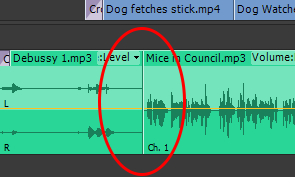
If we play this through, there is obviously an abrupt change which does not sound good. Pick up the “Constant Power” transition form the Effects Panel and drop it onto the point at which our clips meet.
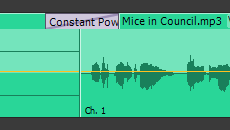
On playback this should sound a lot better. Now shorten the end of the music clip and delete any transition present at the end of the clip. Drag an instance of the music from the Project Panel and place it at the end of the voice over clip.
Now try to drop a “Constant Power” transition over the point where the two clips meet. Notice that Premiere CS6 will not let you do this and defaults to a single sided transition. The reason is that the music clip has not been trimmed in, as we can see from the tiny grey triangle at the start of the clip which tell us that there is no previous content to our start point for Premiere to use within the transition. The answer? – we need to adjust the music clip’s starting/in point.

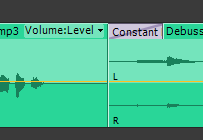
Once you have trimmed in the music clip start point, re-apply the transition and all should be well.
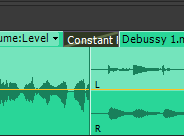
For this particular transition, we may like to make it fairly long for a better result as the voice over slowly fades out. Click the transition and you will notice that it appears in the Effect Controls Panel. Here, you may adjust the transition length by clicking and dragging on the orange numbers. Let’s make the transition about 5 seconds long.

Now you should be able to apply both single sided and double sided transitions to a sequence. Click control-Z several times to move back through your actions and separate the audio clips back onto their own tracks.
Constant Power
When applying a transition named “Constant Power” the audio change is very smooth as the rate of change is altered throughout the transition in opposing ways between the audio sources.
Constant Gain
With this transition, the overall audio gain rate of change is kept the same. This can sometimes cause an abrupt or unnatural sounding transition between clips.
Exponential Fade
This is similar to the Constant Power transition yet is more gradual. This is achieved through the use of logarithmic curves
