Lesson 5B – The Audio Mixer
When editing in the CS5.5 Workspace the audio mixer may be found next to the Effects Controls panel. Click the tab to reveal it.
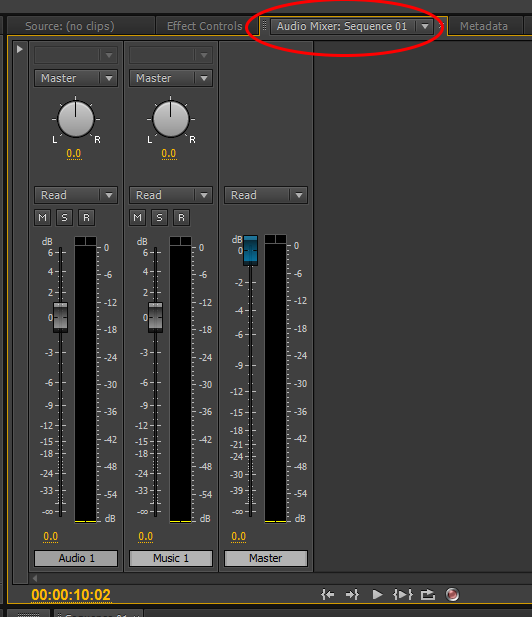
The audio mixer mimics hardware multi-channel audio mixers that are used throughout the AV industry. The software version in Premiere CS6 allows alteration of track volume levels via faders, soloing, muting, adding effects, routing and panning of audio tracks. The mixer may also be fully automated, whereby all control movements may be recorded in real-time as the audio plays.
Currently, we have two audio tracks within our sequence, Audio 1 and Music 1, and each of these has been assigned a Track/fader within the mixer. There is also a Master Track/fader. The Master level is the sum of all audio tracks that are playing together and represents the sum total of your audio output from any given sequence within Premiere CS6.
Play back your sequence and you should see the audio level meters move up and down representing the audio levels present within a particular track.

We only have music within our sequence so this level is shown in the appropriate track. The level shown in the individual tracks is dependent upon the audio gain setting we have set within the audio clip on the Timeline. Effectively, the audio gain set in the Timeline controls the input level to the mixer’s Track.
The mixer track/channel level may be increased or decreased to adjust the overall “mix” or “balance” of the audio tracks within your sequence, which is in turn fed to the stereo, Master output. Confused? it gets worse but don’t worry. Audio is all about maintaining the quality of the chain, the initial source audio should be good quality and recorded at the right level without distortion. If this has been done then your work as an editor in post production is relatively easy.
Let’s add another audio track, this time it will be a voice-over, or spoken word track. Right-click and choose “save target as” to download the file below, “Mice in Council“
| Mice in Council – Audio File |
Next, import the file into the Project Panel and drag onto track 1 in the timeline of your sequence. You may need to extend the end of the music track a little so that they are of similar length. Your timeline should look like this:
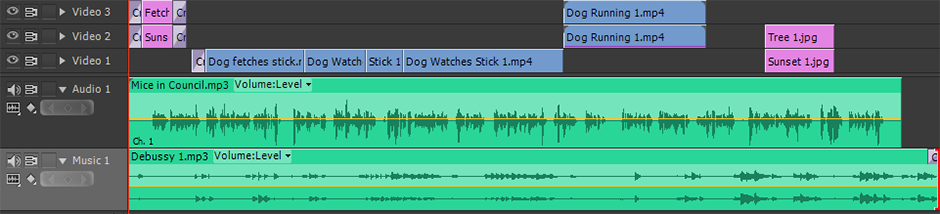
Play through the sequence to hear the two audio tracks together. The voice over has been optimised before we acquired it, so the peak levels are quite high. However, you may notice that the voice and music are competing with each other a little in the louder sections of the music.
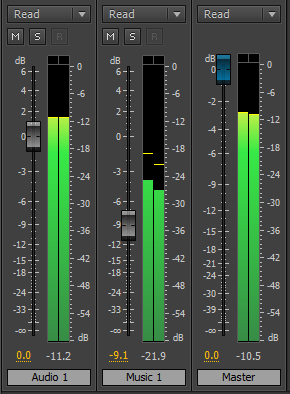
There are numerous ways to deal with this using effects but for now let’s just pull down the fader of the Music 1 track until the two audio tracks sit nicely together and neither is over-powering the other. We found setting the fader level of the Music 1 track to -9dB to work quite well.
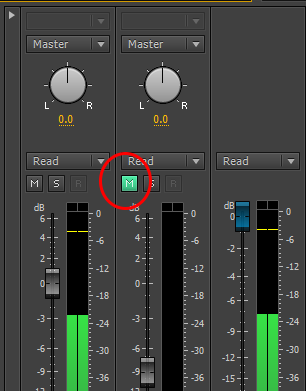
Mute Button
On each audio channel there is a button marked “M“. This is the “Mute track” button and is a common function on audio mixing consoles. Clicking the button will silence that particular track, enabling you to hear the rest of the audio mix.
Solo Button
Pressing the “Solo track”” button will allow you hear that particular track in isolation, muting the other tracks.

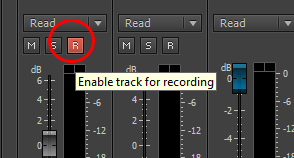
Record Track
This button arms the track for recording. if you have an appropriate sound card installed in your computer and a microphone connected, you may for instance record a voice over track directly into Premiere CS6. This process will be covered in another tutorial.
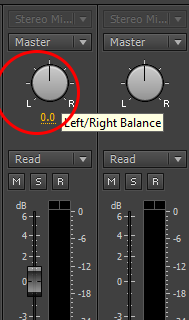
Left/Right Balance
This control is available for all audio tracks within your sequence. On a dedicated mixing console this is known as the “Pan” control and allows positioning of sounds either left, right, or somewhere in-between across the stereo field. Try turning the voice over track to the left and right to hear the results.
Show/Hide Effects and Sends
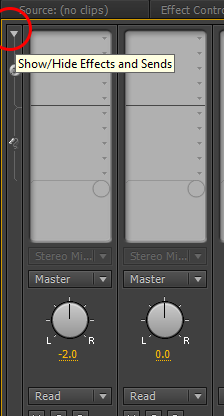
At the top left of the Audio Mixer you should see a small triangle. Twirling down this triangle will expand the mixer channels to reveal all effects and sends applied to each track.
Audio Meters Panel

The total audio output levels from the Audio Mixer Panel are shown in the Audio Meters Panel which is situated to the right of the timeline by default in this workspace. This is useful if the Audio Mixer Panel is closed or hidden and gives a good indication of the total audio output levels from your sequence.
A good safe audio level should be around -12dB with peaks up to -6dB. This is the total audio level of your sequence that will be sent to any external device that is connected to your system. This level will also be recorded to any output file created from your sequence. The Audio Meters Panel may be enlarged if you wish by dragging to another location or stretching the side of the frame.
If you have enjoyed this online tutorial in Adobe Premiere CS6, please click the link at the bottom of the page to move on to the next lesson.