Lesson 5A – Audio Tracks in the Timeline
In the timeline, audio tracks behave pretty much in the same way as video tracks. You may add or delete them from the timeline, expand or enlarge them to see more detail, add keyframes, cut and edit with the same tools, add transitions & effects.
Let’s open our project and tidy up the timeline so that it looks like this:

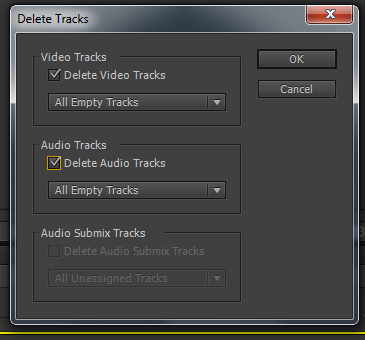
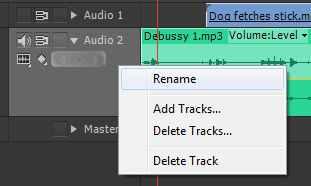
You should have three video tracks and 2 audio tracks, and one track entitled “Master” which allows overall control of the audio within a sequence. If you have some empty tracks, right-click on the track name and select delete tracks. In the pop up box you can select Delete Video Tracks and Delete Audio Tracks. This will tidy up your sequence and enable you to view the content more clearly.
Expand Audio 2 by twirling down the small triangle next to the track name:
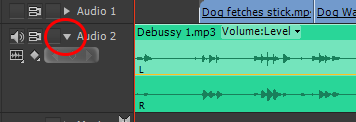
This allows us to view the audio waveform of that particular track, which is very helpful when editing audio in the timeline. We can also name the track to something a little more useful than “Audio 1“. As we have the music on this track let’s call it “Music 1“.
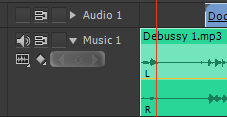
We don’t need the audio that is associated with our video clips (recorded in camera) so let’s right click on each clip, unlink the clips and delete the audio segment as we did in a previous lesson. Our timeline should now look like the one below. Note the speaker icon (circled), this denotes whether the track is turned “on” or “off“. When the track is turned on we will hear it in the “mix“, when turned off we will not hear the track’s output.

Mono & Stereo
Note that our music track contains two audio waveforms. This is because the audio has been recorded in stereo. Stereo recording is a method of audio recording developed many years ago to mimic the way that our ears interpret sound. The waveforms appear similar but if you look closely you may see the difference between the Left channel (marked L) and the Right channel(marked R) of the stereo audio. Stereo audio allows us to position audio elements left or right within the stereo field. The resultant sound will emanate from the left or right speaker.
Audio tracks may also be recorded monaurally. This is usually the case with voice recordings. If we are creating an online video production for instance, we may receive the voice-over recording in mono format. A mono track will be a singular waveform.
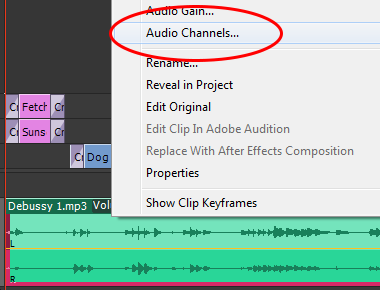
When you drop a particular type of audio file onto the timeline, the correct type of track is automatically created. Right-click on the music and choose Audio Channels.
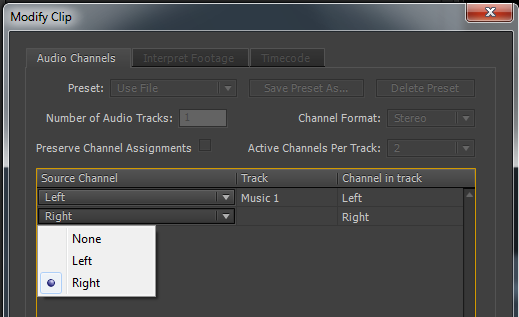
The pop up box contains details of the audio channels and you may alter some properties of the file.
Audio Gain
One way of altering the level or Gain of a particular audio file is to right-click on the file and select Audio Gain.


Set Gain to:
This option measures the audio in decibels (dB). The original value of your audio, whatever level it was recorded at will represented in Premiere CS6 as “0dB“. This basically means that no change has been affected to the original recorded audio. To lower the gain of a particular clip, enter a minus figure in the box. To increase the gain add a positive figure.
Adjust Gain by:
If you Adjust this figure to say, -3dB, the figure will be shown in “Set Gain to:” will show “-3dB“. if you then click “OK” and go through the process once more, the figure in “Set Gain to:” will be changed to show “-6dB“. This is good for incremental changes in gain level while you are working on your sequence.
Normalize max Peak to:
The normalize function will maximize the gain of your audio clip to the level set. 0dB is the maximum audio level available when working with digital audio without introducing distortion. Select this option and then view the result within the timeline. The loudest peak within the file will now be equivalent to 0dB, and the other peaks within the clip will be adjusted relatively to this peak level.
When using this option with multiple clips selected, the clips amplitude will be adjusted relative to each other, i.e. their relative levels will be preserved.

You should see that the waveform has increased in size and when you play it back the loudness has increased also. The normalize function is a good way to apply equivalent gain adjustments to multiple clips in a sequence so that they match. Note that increasing the gain will also raise the noise level inherent within the clip.
Normalize All Peaks to:
Use this function to set the maximum peak level to a figure of your choice. When multiple clips are selected, they will all be affected the same way and relative values will not be preserved. i.e. all of their max peak values will be the same.
Gain vs. volume
Gain is usually used to set the overall level of a particular clip. Volume changes applied through the audio mixer or using keyframes should be used to affect the loudness of the clip over time.
