Lesson 4A – Motion Effect
Motion is a fixed effect. That means that as soon as you use any clip in the Timeline, the Motion effect is automatically applied and appears as one of the clip’s fixed effects in the Effect Controls Panel. Although fixed effects are intrinsic to all clips, they do not change or affect the video clip until their parameters are adjusted.
The Motion effect is used to re-size video and move the video left, right, up, down and even rotate through the frame of the sequence. All of the movement may be controlled over time by adding Keyframes.
Select the “Dog Running” clip in your Timeline, reset the Workspace and select the Effect Controls tab.

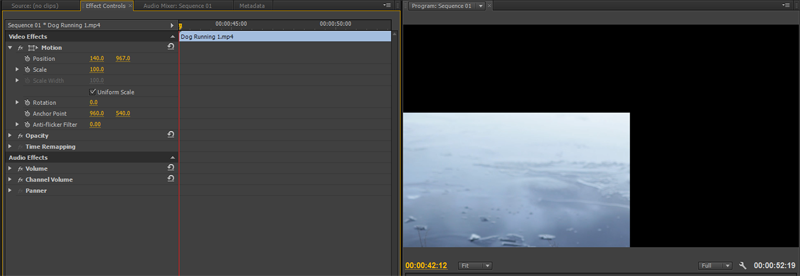
The fixed effects for the selected clip are listed on the left side and the Timeline View is shown on the right. The Timeline View is a close up of the clip selected in the Timeline and allows us to add and adjust Keyframes to the effect parameters. Show or Hide the Timeline View by clicking the triangle shown above.
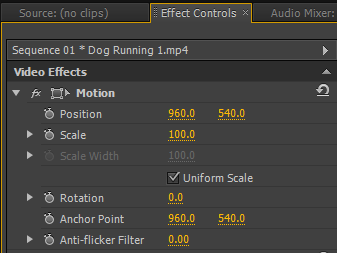
Twirl down the Motion triangle to reveal the effect parameters.

Position
The two figures to the right of the Position parameter denote the clip’s current position in the frame (Program Monitor). The first number represents the x-axis (movement left & right) and the second figure represents the y-axis (movement up & down).
By default, these figures will be exactly half the pixel dimensions of your sequence. For example, our sequence is high definition at 1920*1080 which when halved gives us 960 & 540 respectively. This means that our clip is perfectly centred within the sequence frame. The reference points are measured in pixels from the top left corner of the frame.
Grab the yellow “960” and move it left and right with your mouse. You should notice that the video clips moves within the Program monitor. Try the same with the yellow “540” and you should see that your clip moves up and down.

Reset
The Reset button can be found in the top right of the parameters box. Press it to centre the clip once more.

Scale
The Scale parameter alters the size of your video clip. The default size is 100, lowering this number will make the clip smaller, increasing the number here will enlarge the clip within the sequence frame. Grab the yellow “100” alongside Scale and drag your mouse left and right to see the change.

By default, the “Uniform Scale” option is checked. This ensures that the aspect ratio of your clip is correctly maintained when you alter the scale. If you would like to alter the width and height of your clip independently, un-check this box and the options will change.

Rotation
With the Rotation parameter you may spin or rotate the video within the frame. Also, the anchor point about which the video rotates may be changed. Twirl down the Rotation triangle to reveal the control and try rotating your video clip.

The rotation amount is measured in degrees and a positive number will rotate the clip clockwise, while a negative figure will rotate the clip anti-clockwise. Once rotated past 360 degrees, the number of rotations will be counted.

Anti-Flicker Filter
Sometimes when applying the Motion effect to certain types of video unwanted distortion or flicker may result. In this case, apply some blur to the clip using the Anti-Flicker Filter. You may find that this happens with video that contains horizontal lines.

