To tidy up our learning so far we are going to check out a few options that are available by right-clicking on any clip in the Timeline, or using the Clip menu. Download the following video file to your project folder (right-click then “save target as”)
| Dog Running 1 [Video File] |
Use the Media Browser to locate the file and import it to your Project Panel as before. At this stage, it may be a good idea to save your project as a different name. This will allow you to return to our basic project at any time, and also allow you to experiment with different settings and effects.
Go to “save as” from the File menu and name it “My First Premiere Project 2“. Remember that project files merely contain links to your assets, therefore a project file is small in terms of data usage. You may keep multiple versions of your projects but it is a good idea to number them sequentially. This way you always know which is the latest version.
Drag the “Dog Running 1” file onto the Timeline, to the right of your edited sequence.
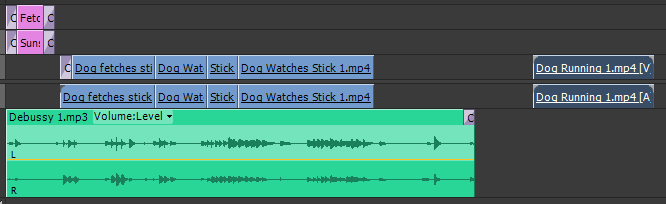
Let’s right-click on the clip and look at some options
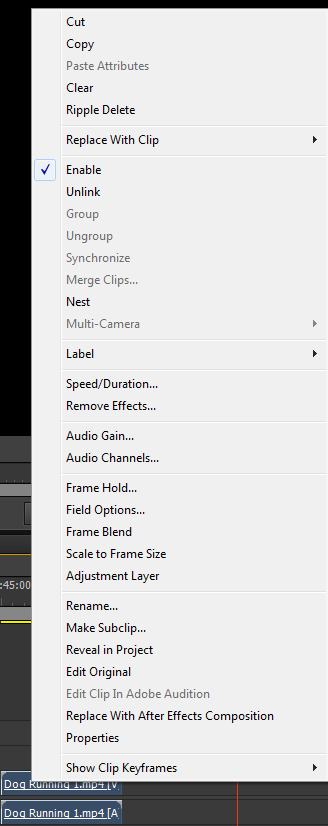
We can see that there are a number of options. Cut & Copy work in pretty much the same fashion as any Windows software. Clear will delete the clip from the Timeline. Paste Attributes is a useful option that allows you to copy only the effects attributes from one clip to another (more on this later).
Enable
When the enable option is ticked, the clip is active in the Timeline. If the option is unchecked, the clip is disabled in the Timeline (it is inactive and does not show in the Program Monitor). This option is useful when experimenting with different clips place, without removing the edit completely from the Timeline.
Unlink
This will probably be the option that you will use the most from this menu. Generally, video clips will have associated audio attached to them. In its original state the video and audio segments of a clip are said to be “linked“. That means if one is cut or trimmed then so is the other. Sometimes however you may wish to delete just the audio or the video segment. Or, you may wish to cut the video and audio at different points within the clip. To do either of these things, you must first “Unlink” the audio and video within the clip.
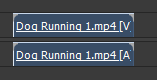
When a clip contains linked video and audio, the title will be underlined, as below.
Right-click the clip and select “Unlink“. You may now select either the video or the audio within the clip separately and each one will darken upon selection.
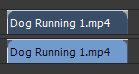
The video or audio may now be deleted or independently trimmed, leaving the other in place. To re-link the audio and video, select them both using the “Shift” key, then right-click and select “Link“. The clip title will be underlined once more, denoting a linked clip.
As you progress with editing, you will find that you need to link and unlink clips often.
Label
This option allows you to adjust the colour of a particular clip within the Timeline. Generally it is a good idea to work within the standard Premiere label group though that assigns different colours to different types of asset in the Timeline
Speed/Duration
Slow and fast motion of video footage is a popular effect. It may be achieved using the Speed/Duration option here. Click the option to see the pop-up menu.
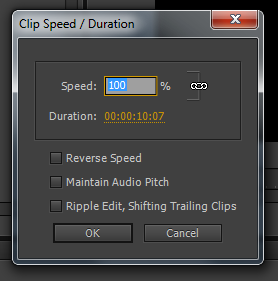
By default, a clip plays at its original speed which is denoted by “100%” i.e. 100% of the original speed. To slow the clip down we need to enter a lower percentage, to speed the clip up we need to enter a higher percentage.
For example, if we want the clip to play back at half the original speed, in slow motion, we may select a figure of 50%. Let’s try this and see how it looks.

Notice that the clip’s Duration has changed; it has doubled from around 10 seconds to 20 seconds. This is important as it affects the position of other clips in a sequence, and ultimately the sequence length.
We can achieve the same result by adjusting the “Duration” parameter instead of the percentage. This is useful when you know that a clip must fill a certain amount of time.
Ticking the Reverse Speed option will actually play the clip in reverse and the slow or fast effect options obviously still apply.
Ticking Maintain Audio Pitch will enable Premiere to attempt to keep the audio pitch normal, regardless of the speed of the video.
Ticking Ripple Edit, Shifting Trailing Clips will allow the speed of a clip to be altered with the other clips in the sequence moving and making room for the adjustment, rather than being cut by the clip you are adjusting.
Remove Effects
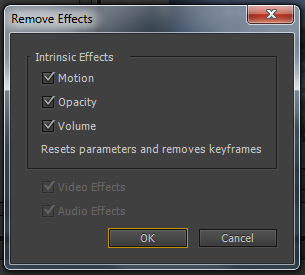
This is a quick and easy way to remove all effects applied to a particular clip and reset the clip. Merely tick all boxes for the types of effect that you wish to remove (more on effects in the next lesson).
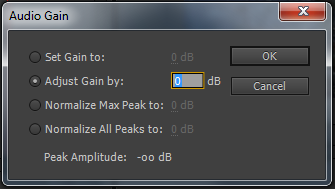
Audio Gain
Here we can alter the gain or perceived volume of the audio within a clip. More on audio in a later section.
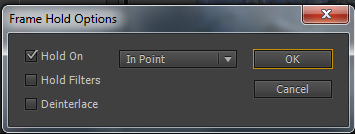
Frame Hold
This option allows us to turn a clip into a single frame. Set it to hold on and choose the In, Out, or a marker point within a clip to play that one frame for the duration of a clip within the Timeline.
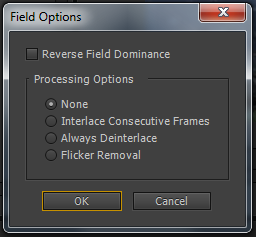
Field Options
Video is usually recorded in two “flavours”, interlaced and deinterlaced (progressive). The full explanation of which is a little beyond the realms of this particular tutorial. If you are shooting on a DSLR, you will more than likely be shooting in deinterlaced (progressive, denoted by the “P” in the options).
It is a good idea to use the field options to adjust any asset that does not conform to the sequence settings. For example, if you would like to import an interlaced video to a progressive Timeline, you can select “Always Deinterlace” here.
Frame Blend
When altering the speed of a clip, the resultant video may appear a little “choppy”. Apply Frame Blend to try to smooth the motion of the clip.
Scale to Frame Size
This option is useful when importing assets of different sizes to use in the same sequence. For example, you may wish to use a still image taken with your DSLR that does not share the same pixel dimensions as your video. Download the image file below and import it to your project.
| Tree 1 [Image File] |
![Tree 1 [Image File]](http://www.reel9.co.uk/Tree%201.jpg)
If you hover over the file within the Project Panel, you will notice the Properties box pop up.
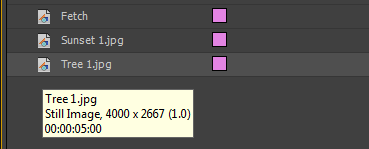
We can see that the dimensions of the image do not match the 1920*1080 pixels of our sequence. Drag the file into the Timeline to see what happens. You should notice that the image is too large. Right-click on the image and select Scale to Frame Size. The image will automatically shrink to fit its longest edge within the frame of the sequence. It is interesting to note though that the full image does not fill the frame, this is due to aspect ratio issues that will be covered in another lesson.
Adjustment Layer
This option turns your clip into an adjustment layer. An adjustment layer can be through of as transparent video that contains effects that affect all layers below it. There will be a specific lesson regarding this later.
Rename
This is self-explanatory and allows you to give a different name to a particular clip or instance of the same clip in the Timeline.
Make Subclip
You may bring a clip into the Timeline, trim it and then create a new or “subclip” from this edited clip that will be added to the Project Panel for future use within your project. Try this option with our clip.
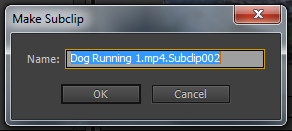
Notice the change to the Project Panel.

Reveal In Project
This option is great when you need to find the original clip in the Project Panel when you have a large amount of assets. Select the option and the original clip will then be highlighted in the Project Panel
Edit Original
Use this option for images and other assets to open the asset in your computer’s default software for that type of asset so that it may be edited. For example, right-clicking on our “Tree 1” file may open the file in Windows Photo Viewer.
Edit in Adobe Photoshop
Use this option to send your image from the timeline to Photoshop for editing
Replace with After Effects Composition
If you have Adobe After Effects installed on your computer, this is a quick way to create a new composition of the correct size to replace any clip within the Timeline.
Properties
Use this option to view the properties of any particular clip or asset in the Timeline. This is useful to check sizes and frame rates of assets.

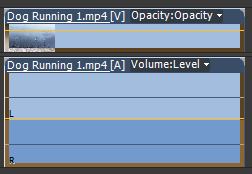
Show Clip Keyframes
Twirl down the triangles on track video 1 and audio 1. You should notice a yellow horizontal line running through our clip. By default, the yellow line on the video track represents the video Opacity, and the yellow line on the audio track represents the audio volume. Sometimes you may add several different types of keyframe to the same clip. This option allows you to view each type of keyframe.
In this lesson we have briefly covered some of the options available when right-clicking clips in the Timeline. This is a useful, quick way to make changes to your project. You may also select “Clip” from the main menu to access similar options.