In this lesson we will look at the Source Monitor. First let’s tidy up our project a little, go to Window/Workspace/Reset Current Workspace (we should be working in Editing CS5.5).
Next let’s delete any empty tracks from our timeline that are taking up space. Go to Sequence/Delete Tracks from the main menu.
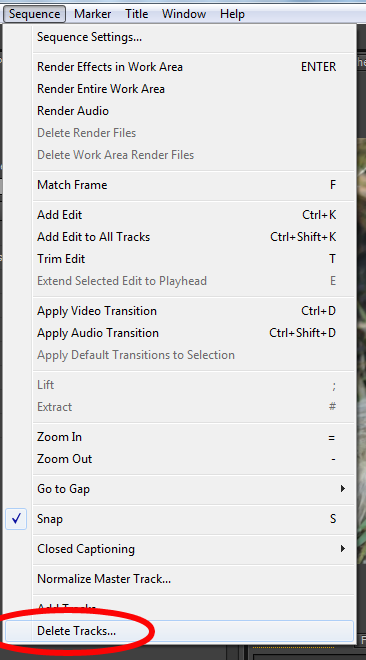
When the new window appears, tick both boxes to select all empty tracks, both video & audio.

Now drag down the top edge of the Timeline a little. Our workspace should look like this.
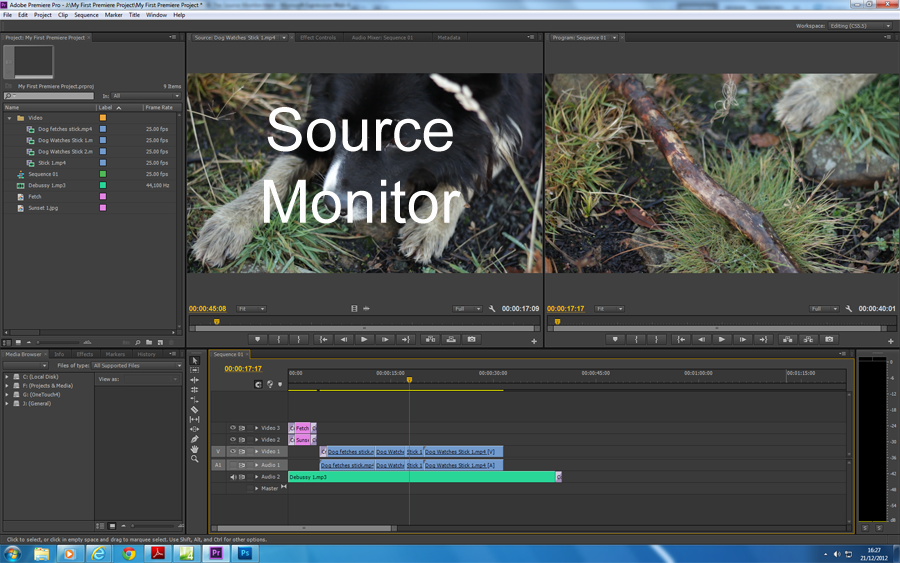
The Source Monitor may be used to view your original, unedited clips. Double-click any file in the Project Panel and it will open in the Source Monitor. Alternatively, drag the file from the Project Panel into the Source Monitor.
You should now see two different video images, one in the Source Monitor and one in the Program Monitor. Remember that the Program Monitor will display the position of the Playhead on the Timeline. The Source Monitor has it’s own playhead which can be dragged through the source clip.
This system of monitoring originates from the days of tape editing, where the source video machine would feed one screen and the record videotape machine would feed another screen.
Controls

The first three buttons from left to right are:
Add Marker – This allows you to add a marker to your video as a visual reference for a particular point in the clip
Mark In – This sets the In point of the clip
Mark Out – This sets the Out point of the clip
Adding In and Out points to a clip is similar to trimming the In and Out points of a clip in the Timeline, as we have already done.

The next four buttons are the transport controls:
Go to In – Takes you to the In point that you may have set
Step Back – Moves backwards through the video frame by frame (good for fine detail editing)
Step Forward – Moves forwards through the clip frame by frame
Go to Out – Takes you to the Out point of the clip that you may have set
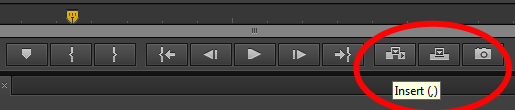
The last three buttons send the source clip to the Timeline and export a frame of video.
Insert – Once your In and Out points have been set you may Insert the clip at the current Playhead point within the Timeline. Using the Insert button will split the Timeline video at that point and Insert your new clip onto the Timeline edit sequence, moving the current clips to accommodate the new clip.
Overwrite – This also sends your marked clip to the Timeline but the current Timeline clips remain in place and do not move. The new clip Overwriteswhatever current Timeline clips it covers.
Export Frame – This button exports the current frame from the Source Monitor and allows you to save it as a still image, as we did earlier when looking at the Program Monitor
As with the Program Monitor described in an earlier lesson, we also have the Zoom and Resolution controls. Set the Zoom level to Fit for now so that we can see all of the video frame.
Using the Source Monitor is a good way to check clips before bringing them into the Timeline. You may also trim your source material here and send it directly to the Timeline.
Some editors may wish to trim up all of their original clips before compiling them in the Timeline. Once you set In and Out points for a clip, they will remain each time you use that particular clip. For example, if you set In and Out points for a particular clip and then drag the clip from the Project Panel to the Timeline, the shortened, marked clip will appear in the Timeline, not the original.
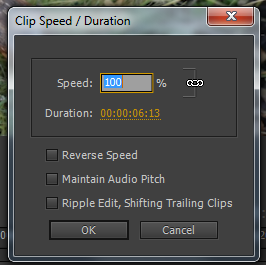
Let’s try this, drag and drop the “Stick 1” clip from the Project Panel into the Timeline. Right-Click on the clip in the Timeline and select Speed/Duration. We can see that the clip is around 6 seconds long
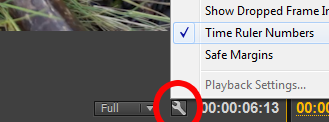
Now double click on the “Stick 1” file in the Project Panel so that it opens in the Source Monitor. Click the Spanner icon to select the Settings and check “Time Ruler Numbers” to display the timecode of the original clip along the bottom of the Source Monitor. Professional video cameras embed timecode in the video footage. Also, when a clip is exported from another Timeline (as is this one) the timecode is embedded into the file.
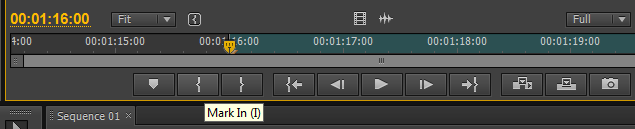
Drag the Playhead to 00:01:16:00 and press the Mark In button to set the clip In point
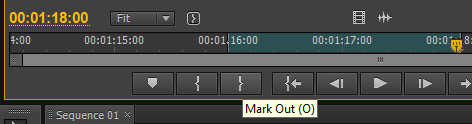
Now drag the Playhead to 00:01:18:00 and press the Mark Out button
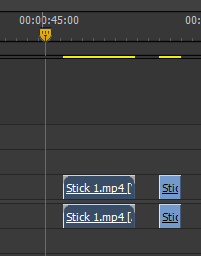
Now drag the “Stick 1” file from the Project Panel into the Timeline again. You should see that the duration of this clip is now two seconds, as opposed to the original clip which was 6 seconds long.
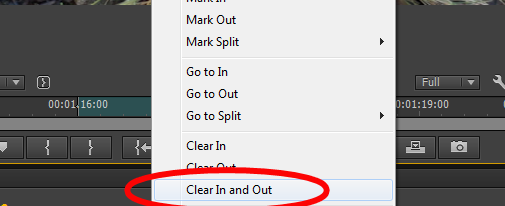
Right-click anywhere in the Source Monitor and select “Clear In and Out” from the menu to reset the clip to it’s original state.
Subclips
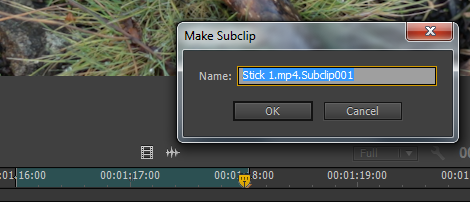
If you have a long clip, you may wish to cut it into smaller sections or “Subclips” that are more manageable. Simply set In and Out points, then right click anywhere in the Source Monitor and choose “Make Subclip” from the menu. Give the subclip a new name and click ok. Your subclip will appear in the Project Panel.
Let’s delete the two clips that we have added to our Timeline and move on to the next lesson.