Click in the middle of any panel and you will notice an orange outline appear. This means that this particular panel is “selected”. Once selected the panel size may be adjusted, or the whole panel may be moved to a different location within the workspace.
You may group panels together in the same space, creating tabbed panels in a “frame”. If we look at the Source Monitor, we can see an example of this.

Here we have several panels grouped together. Try selecting each tab to reveal different panels such as the Audio Mixer and Metadata.
Resizing Panels
With the Source panel still selected, move your mouse over the right hand edge of the window. You should see your mouse pointer change to the following icon:
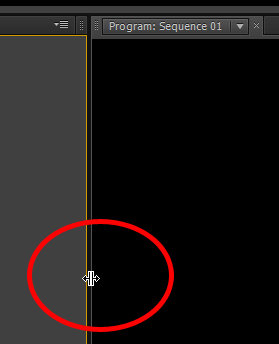
If you click, hold and drag your mouse button left or right you should notice the Source Monitor increasing and decreasing in size. You should also notice that other windows within the workspace will be adjusted in size to compensate. You may resize any window in this manner, adjusting any window edge, left, right, top or bottom.
Moving Panels
In the top left of each panel there is a “gripper” icon. If you click, hold and drag this icon you will pick up a panel and be able to drop it into a new location, such as grouping with other panels, or placing to the side of another panel.
![]()
Try picking up the Source Monitor and moving it just to the left of the Timeline panel. You will notice as you move the panel around and hover in different areas, trapezoid purple shapes will appear denoting the “drop zone” for the panel, to the right, left, top, bottom and middle of another panel.
Hold the Source Monitor panel to the left of the Timeline panel until you see a purple shape as below, then let go of the mouse button. The panel should now be dropped into a new location.

The lower workspace should now look like this. Notice that the Timeline panel has shrunk to compensate for the move.

To move a panel to form a group of tabbed panels, simply drop the panel into the centre of another panel to dock it.
Resetting the Workspace
If you have made a mistake and the workspace does not look the way that you would like to, reset the current workspace by selecting Window/Workspace/Reset Current Workspace from the top menu.
Floating Panels
Panels or entire frames (groups of panels) may “float” in the workspace independently of the other panels. Find the Panel Menu in the top right hand corner of any panel, such as the Project Panel.
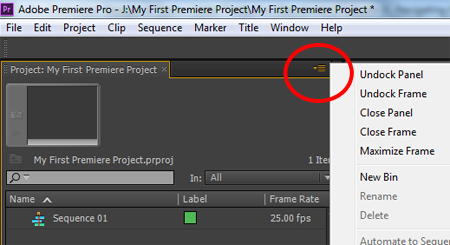
Left click the Panel menu icon and select Undock Panel. You have now created a floating panel that can be moved over other panels and positioned anywhere in the workspace. To re dock the panel, reset the workspace.
Here’s a quick recap: