Double click on the Premiere CS6 icon on your desktop and you will be greeted with the following window

Premiere provides a list of recent projects that you have worked on for ease of use. As it is your first project, click on “New Project” to get started. You will then see the following screen
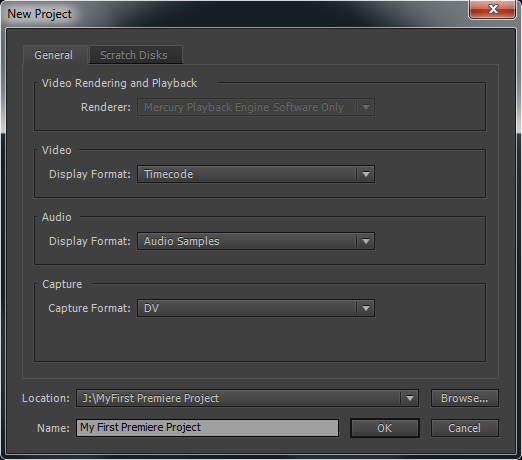
In this window, you may enter the general settings for your project;
GENERAL TAB
Renderer: If you have a CUDA enabled graphics card then you may be able to use Adobe’s Mercury Playback Engine. This allows your computer to share the load from the CPU to the graphics card, enabling smooth playback and more effects to be applied to your video in real-time. If your graphics card is not enabled then this option will be greyed out.
Video: This selects the time format that video is displayed. In most cases this may be left to “Timecode” which displays video in the standard format of hours, minutes, seconds and frames.
Audio: Here you may select how audio is displayed, you can leave it set to “Audio Samples” in most instances, although it may be changed to milliseconds.
Capture: This may be changed from “DV” to “HDV” and refers to the format of your source footage. If you are capturing video from your camcorder, then select the appropriate format.
Location: Press the “Browse” button to select a location for your project on your computer’s hard drive. Your computer may have two hard drives or more. It is advisable not to select the “C” drive or boot drive of your computer for your adobe projects as the software itself runs from this drive. Select an alternative drive and create a new folder. In our example we have named the folder “My First premiere Project”. This folder should now be used to store all of your files/assets that you wish to use within your project.
Name: This should be the name of your project. In our example we have named it “My First premiere project”. The project file will be created once you press “OK”. This file will be saved within your project folder. Each time you wish to work on your project, double click the project file to open your project.
It is important to note that the Premiere project file does not contain any video or assets. It is merely a reference to video and assets that you may wish to use.
SCRATCH DISKS TAB
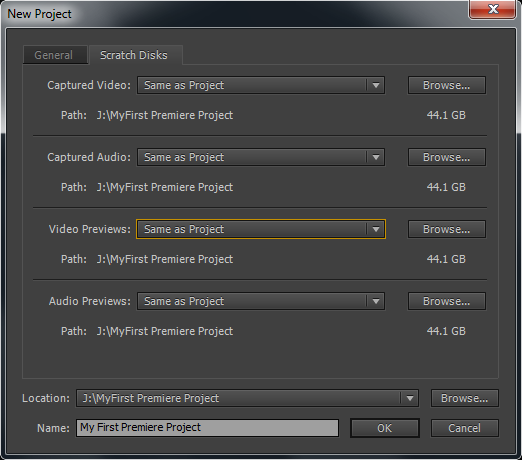
Here you may select where Premiere will store all of your video and audio files and previews that are relevant to your project. As we can see the defaults for all options are set to “Same as project” and this will be fine whilst learning to use Premiere. More advanced users may set preview files to different drives within their computer to speed up the editing process.
Click “OK” in the window and the following window will appear

A sequence represents an edited segment within your project. Your project may consist of as many sequences as you like, in as many different video formats as you like. If you have a specific video camera, you should be able to select the correct format for your camera here.
We will be basing these lessons around video production with a DSLR such as the Canon 60D, so in this instance we will select Digital SLR / 1080P/ DSLR 1080P25.
1080 describes the number of vertical pixels in the image, P denotes “progressive” (rather than interlaced), and 25 represents the number of frames of video per second. You may name the sequence to your preference, but for now we will leave it at the default name which is “Sequence 1“
Click “OK” when you have selected your prefered format and you will be taken to the Premiere workspace.
Play the video for a quick recap, then move on to the next lesson.