Videos created for broadcast purposes need to be constrained to certain levels of colour saturation and brightness. This can be quite a technical operation and there are many ways to achieve the correct levels, by monitoring on external scopes for instance. The levels for broadcast video were set back in the days of analogue video where excessive levels would cause severe problems for video engineers and TV transmissions. Different broadcast video formats such as SD, HD , PAL and NTSC require different maximum level settings.
Computers and digital technology can handle much higher, excessive levels quite well. If your video is created purely for the web, then it is not imperative that the levels contained within the video are broadcast safe.
Premiere CS6 offers a simple effect that will automatically constrain colour saturation and excessive or “blown-out” white levels within an image.
The Broadcast Colors effect can be found within the Effects panel in the Colour Correction group
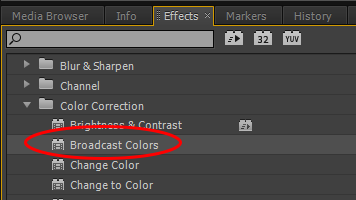
Properties

Broadcast Locale
This property selects between NTSC (American system) and PAL (European standard) video formats. This will obviously be dependent upon your intended audience location and camera format used.
How to Make Color Safe
The image saturation or luminance may be selected to be reduced to achieve broadcast safe levels. Key Out Unsafe/Safe may be selected to easily view areas of the video that are affected.

Maximum Signal Amplitude
Video signal amplitude or levels are measured in IRE (Institute of Radio Engineers) and the maximum level may be set here.
Reference Monitor
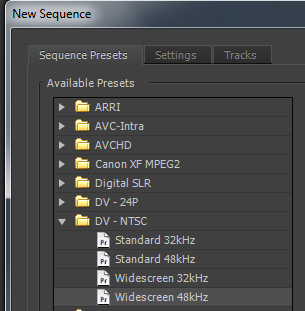
To understand video levels we really must take a look at the Reference Monitor. Create a new sequence by selecting File/New/Sequence and choosing DV-NTSC/Widescreen. Call it NTSC for now.
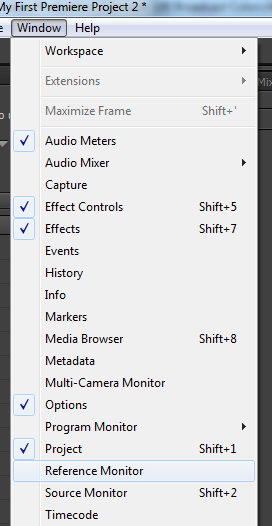
Select Window/Reference Monitor and a new window will appear.
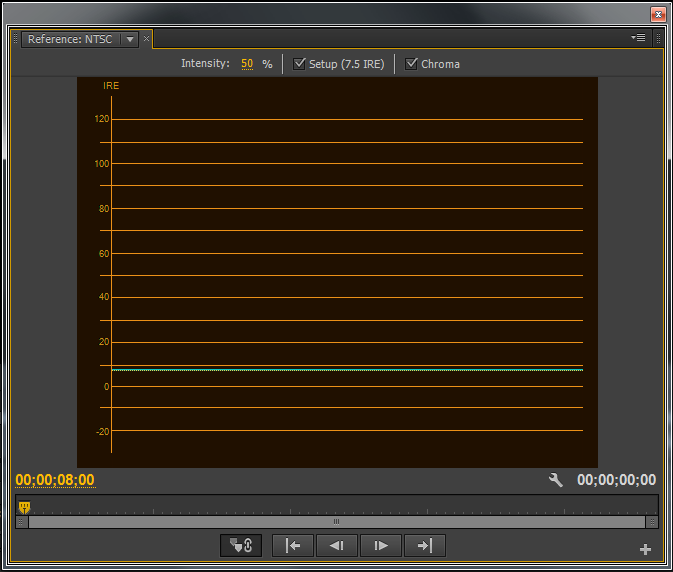
The reference monitor is specific to the type of sequence you are working in. In this instance we have an NTSC reference monitor as we are working with an NTSC sequence. The NTSC system uses the IRE measurement system so as we can see, IRE is denoted vertically from -20 to 120 on the left hand side of the monitor. If we were to use a PAL sequence, the measurement would be in Millivolts where 0 corresponds to 0.3 Volts.
The tick box at the top that is named “Chroma” means that the color information will be displayed along with the luminance information from the image.
We can also see a green line specifying 7.5 IRE at the bottom. This is generally accepted as the correct level for any black within the image.
Let’s drop a clip onto our timeline and see how it looks in the monitor. Drop an instance of the “Interviewee 1” clip onto the Timeline. Premiere will prompt you to change the settings of the sequence, ignore this and keep the original settings.
As the clip has HD dimensions, we need to scale it down within the Effect Controls window to fit.
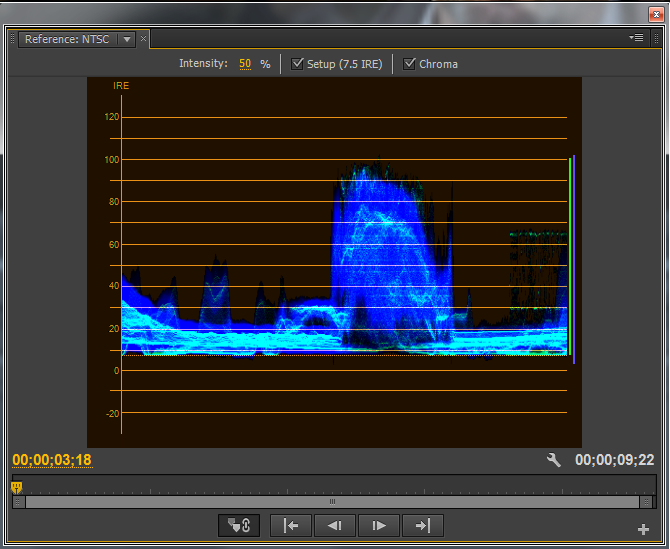
The clip produces the following image in the Reference Monitor:
In the Program Monitor we should see this:

If you scrub through the Timeline you will notice that the Reference Monitor will provide a graphical representation of the video frame displayed in the Program Monitor. The graphics represent the pixels in the image horizontally from left to right, pixel for pixel, so we can see a lot of information around the brightness of the man’s face, denoted by the large blue area. To the left of this, we can see lower graphical values due to the darkness of the image, the black jackets for instance.
Overall, this image has a good balance. The highlights are just reaching 100 IRE, with the black elements of the image touching the baseline at 7.5 IRE.
Uncheck the “Chroma” button at the top of the Reference Monitor, and you should see the following image:
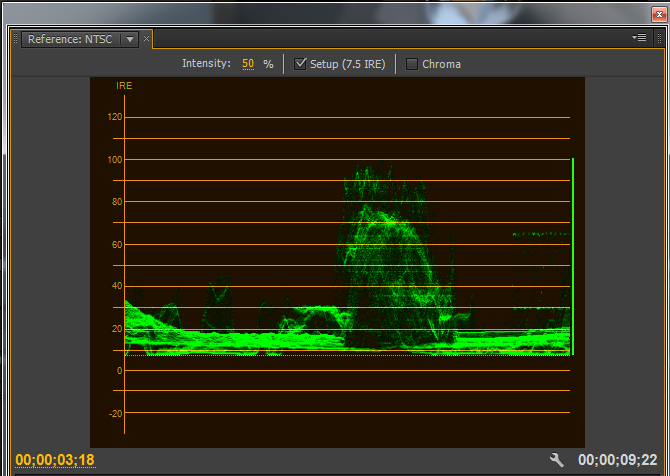
Now we are viewing the luminance information only.
Now lets place the same clip onto an HD sequence. The results in the Reference Monitor should look like this:

Notice that the scale has changed, with 0.3 Volts denoting the baseline for black, and 1.0 Volts the optimum level for white.
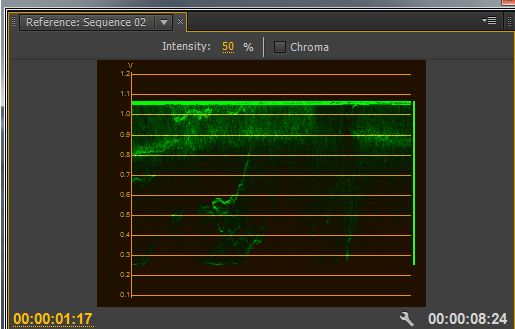
When the Broadcast Colors effect is applied to a clip that contains excessive luminance and color levels, these levels are automatically “clamped” down to acceptable levels. Here is a clip with excessive levels, note the green band above 1.0V:

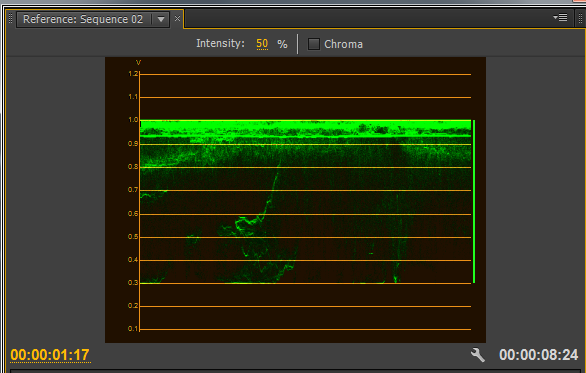
Now let’s look at the Reference Monitor with the Broadcast Colors effect applied, the levels have been clamped at 1.0Volt.
There are many other ways to adjust video levels within your video productions using Premiere CS6 and these will be covered in other turorials.
