The Effects Panel is located to the left of the Timeline under the tab “Effects“.

The Effects Panel contains video effects, audio effects, video transitions, audio transitions and effects presets. Twirl down the various triangles to reveal the contents of each folder.
To search for a particular effect, type the name of the effect in the search window beside the magnifying glass at the top left. There are many effects available within Adobe Premiere and these can be explored at your leisure. For now, we will concentrate upon adding some simple transitions to our video production.
If you use the search box, remember to clear the box afterwards or the list of effects will not operate as normal.
Transitions
Transitions can be applied to video, graphics or audio and allow you to move smoothly from one clip to another. This can be in the form of a simple dissolve or something far more complex.
Let’s add a dissolve to the very beginning of our edit, onto our “Sunset 1” image. In the Effects Panel, twirl down Video Transitions/Dissolve/Cross Dissolve. Pick up the Cross Dissolve transition and drop it onto the start of our image. This will take the image from black (no image) to full opacity over a designated length of time.

Drag the playhead to the start of the sequence and press the spacebar. You should see the image now fade up smoothly. The length of the dissolve is determined in the Project Preferences. Edit/Preferences/General.
![]()
We can see that our Video Transition Default Duration is set to 25 frames. This means that the dissolve will take exactly 1 second to complete as we are working within the format of 25 frames per second. You may also notice that the default audio transition time can be set here.
Now let’s add the same video transition to the end of our image, so that it fades out to black again.
![]()
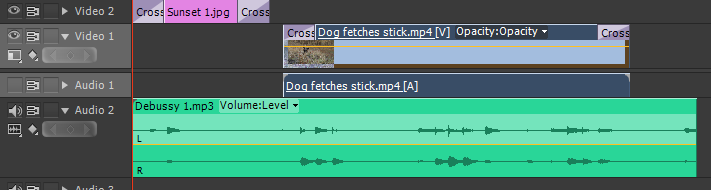
Ok, our still image looks good but the video file cuts in too sharply afterwards. Let’s move it to the right a little and give ourselves some breathing room. As your editing skills progress, you will understand more about edit timing and how important this can be towards the finished result.
Once moved, let’s add the same dissolve transition to the start and end of the video file, as shown below.
Now let’s tidy up the music. We can trim the start point up to the first sound (we can see where this is from the sound wave). At the end of the music segment let’s trim so that it ends on a “flat” or dead section of audio (no sound wave). You may wish to zoom in for this task. Remember, move over the end of the clip and use the Trim Out tool.
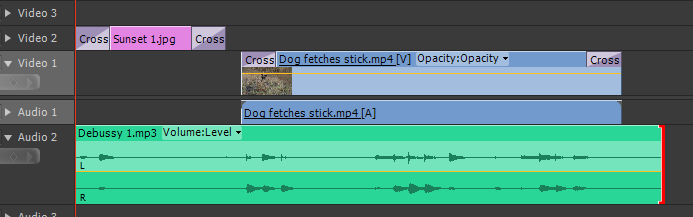
Now let’s add an Audio Transition. In the Effects Panel, twirl down through Audio Transitions/Crossfade/Constant Power. This will give us a nice smooth linear fade. Pick up the effect and drop it onto the end of our music segment.
![]()
You have now successfully added Transitions to your first edit. Save the project and we’re ready to move on with a Title.