Lesson 4D – Time Remapping
Time Remapping is a fixed effect that is automatically available for all clips brought into the Timeline. This effect allows us to alter the speed of a clip over time. For instance, a clip may start at normal speed, double in speed and then slow down to half of it’s original speed. This effect is also referred to as “Speed Ramping” by editors.
Drag a new instance of your “Dog Running 1” clip to the timeline. If you don’t have it then the file can be found in Lesson 3E. Click the tiny triangle next to the word “Opacity” on the clip. Alternatively you can right-click on the word “Opacity“. Here we can choose which yellow Key-framing line is shown. choose Time Remapping and then Speed.

We may now make speed alterations to the clip by adding keyframes as in previous lessons. To add a keyframe, simply hover over the yellow line and click while holding down the “Control” button on your Windows keyboard. Let’s try to show the dog running past in slow motion. Find the point in the clip where the dog enters the video frame for the second time and add a keyframe. Then hover over the yellow line to the right of the keyframe and drag the line down. As you drag, you can see the speed displayed as a percentage. Drag to 25% and let go.
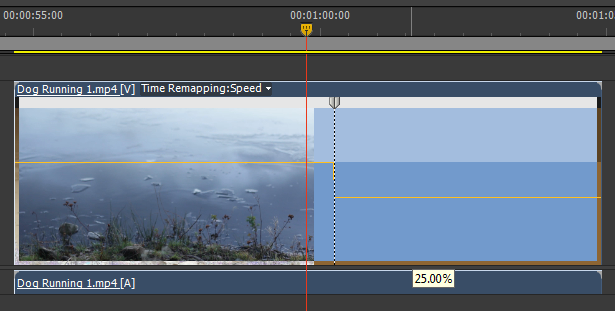
You should now see the dog run past in slow motion. We have expanded and dragged (stretched) the Video 1 track to make the keyframes easier to view. You may add as many keyframes as you like to a clip and drag the yellow lines between the keyframes to change the speed.
Let’s try another clip, drag an instance of “Dog Fetches Stick ” to the timeline. Add some keyframes and pull the yellow lines up and down until your clip looks something like this:
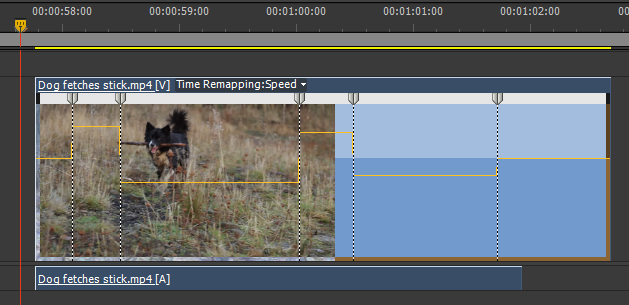
The clip should now change speed as it plays. You may notice that when adjusting the yellow line, the clip length will change. This change in length will obviously affect the rest of your sequence/edit so it is always a good idea to alter speed in a clip away from your edit in an empty space within the timeline.
You may also notice that your speed changes are rather abrupt. To make the changes smoother, you may split the keyframes to add ramps to the changes. Notice that the keyframes consist of two sections, drag the elements of the keyframe apart to smooth the speed transition.
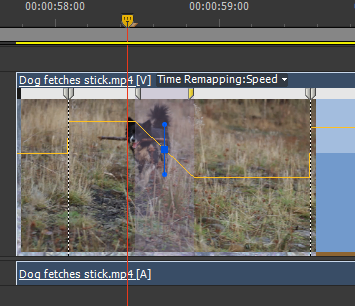
The blue graphic represents the “Bezier curve” and relates to keyframe interpolation which we will deal with in another lesson.
There are certain restrictions to quality speed changes with 25 frame per second video. If we slow down a clip too much, the resultant video will appear jerky. This is due to the fact that there are not enough frames present within the recorded file to enable smooth playback at the new, lower speed. To combat this effect, when you wish to edit video in slow motion it is a good idea to record at a higher frame rate.
Most DSLR cameras will allow you to record at 50 frames per second. This will give you twice as many frames to play with per second in the edit and enable smoother video at lower speeds. If you need super slow motion then you may need to invest in another camera system such as the Sony FS700 which may shoot at up to 960 frames per second.